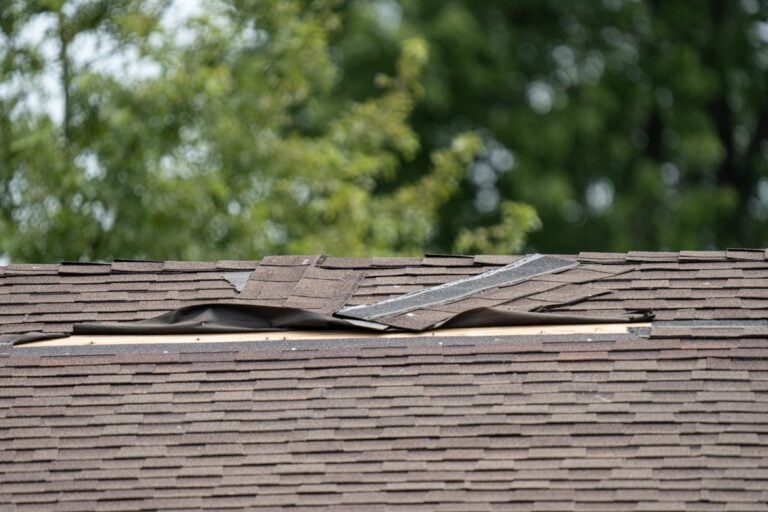
A handful of cracked or missing shingles on your existing roof rarely feels urgent, right up until water stains appear on the ceiling below. Understanding roof shingles repair, from simple fixes you can handle yourself to knowing when a professional needs to step in, keeps small roof damage from turning into major water intrusion. Homeowners in Falls Church and surrounding areas dealing with a few damaged shingles often want to know their options before committing to a bigger project, and having a clear picture of the process makes that decision much easier.
What You’ll Learn
- Why addressing shingle damage quickly matters so much
- Five DIY steps for repairing a small section of damaged shingles
- What professional shingle repair typically costs
- How to decide between a DIY fix and calling a professional

Why Roof Shingles Repair Matters
A missing or cracked shingle might look like a cosmetic issue from the ground, but it’s actually a gap in your roof’s first line of defense against water and storm damage. Addressing it quickly protects everything underneath that layer of shingles.
- Prevents water damage: A single exposed spot can let moisture reach the decking, insulation, and eventually the ceiling below.
- Extends the life of the whole roof: Small, isolated repairs done promptly help the rest of the roof reach its full expected lifespan without further damage spreading to shingles still in good condition.
- Protects your home’s structure: Water that sits under damaged shingles for months can lead to wood rot, mold, and even structural issues if it goes unnoticed.
- Keeps repair costs manageable: A small shingle repair costs far less than the water damage remediation that often follows a delay.
Homeowners across Falls Church and surrounding areas deal with a mix of storms, wind, and seasonal temperature swings that can loosen or crack shingles over time. Catching the damage early, whether from a fallen branch or simple wear, keeps a minor repair from turning into a much bigger project down the road, and it often means the difference between a quick fix and a full replacement. Scheduling professional roof inspections twice a year, ideally in spring and fall, is one of the simplest ways to pinpoint small issues before they turn into something more serious. In between those visits, you can often spot early warning signs yourself just by inspecting the roof from the ground with binoculars and watching for color changes in the shingle pattern.
5 DIY Steps for Repairing Damaged Shingles
For a small, easily accessible section of damaged shingles, many homeowners are comfortable handling the repair themselves. Following the right sequence makes the difference between a lasting fix and one that fails within a season.
1. Identify the Full Extent of the Damage
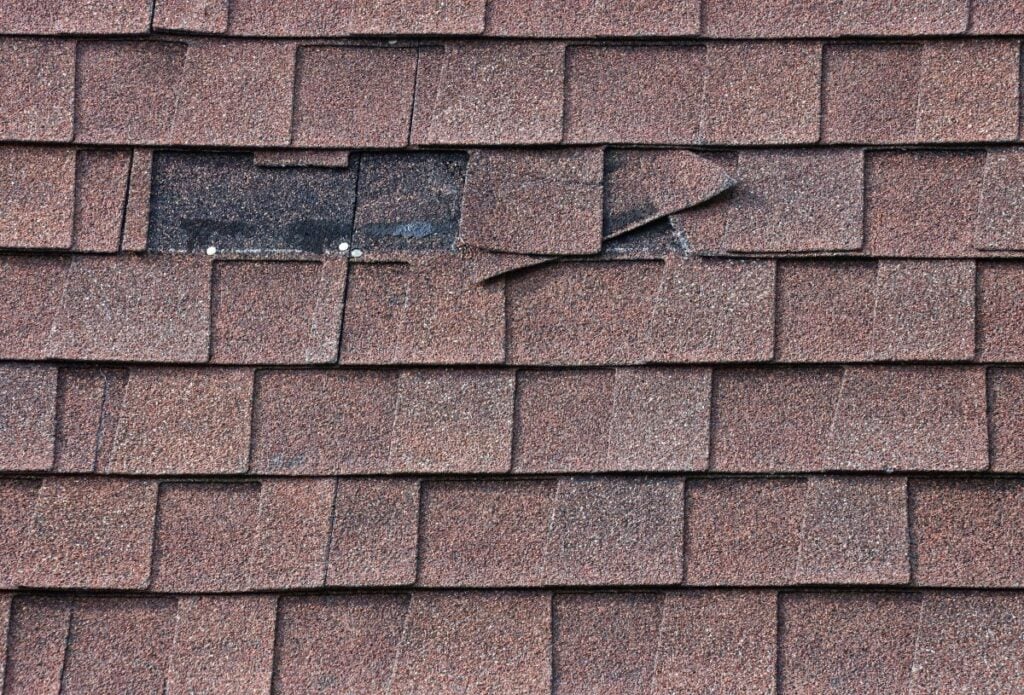
Before starting any repair, take time to inspect the surrounding area, not just the shingle that’s obviously damaged. Cracked or lifted shingles nearby often indicate the same underlying cause and may need attention at the same time, so a quick walk around the whole section saves you from a second trip up the ladder. It’s also worth taking a look at the flashing around any nearby chimneys or skylights, since damaged flashing is a common source of leaks that gets mistaken for a shingle problem.
- Check for granule loss, curling edges, and exposed nail heads
- Look at the shingles immediately above and below the damaged area
- Note whether the damage looks like wear, storm impact, or installation issues
- Curling or blistering shingles nearby can sometimes point to a ventilation issue rather than storm damage alone
2. Gather the Right Materials
Having the correct materials on hand before you start prevents a half finished repair sitting exposed to the weather. You’ll typically need matching replacement shingles, roofing nails, roofing cement, and a flat pry bar.
- Match the replacement shingle’s color and style as closely as possible
- Use roofing nails rated for exterior exposure, not general purpose fasteners
- Keep roofing cement on hand for sealing edges once the new shingle is in place
3. Remove the Damaged Shingle Carefully
Use a flat pry bar to gently lift the shingles above the damaged one, exposing the nails holding it in place. Removing nails carefully, without tearing the surrounding shingles, keeps the repair contained to just the section that needs it.
- Lift adjacent shingles slowly to avoid cracking them in cold weather
- Remove all nails from the damaged shingle before attempting to slide it out
- Set the old shingle aside as a size and style reference for the replacement

4. Install the Replacement Shingle
Slide the new shingle into place, aligning it with the surrounding course, and secure it with roofing nails in the manufacturer recommended pattern. Proper alignment keeps the repair from standing out or creating a new weak point, and manufacturers like GAF and CertainTeed both recommend installing on a warm, dry day so the shingle stays flexible enough to seat properly.
- Nail placement should match the pattern used on the surrounding shingles
- Avoid overdriving nails, which can crack the new shingle
- Press the adjacent shingles back down firmly once the new one is secured
5. Seal the Edges and Inspect the Work
Apply a small amount of roofing cement or sealant under the edges of the repaired area and the shingles directly above it to reinforce the seal against wind and water. A final visual inspection confirms the repair blends in and sits flush with the surrounding shingles.
- Check that no nail heads are left exposed to the weather, and seal any that are visible to prevent water intrusion
- Confirm the repaired section lies flat against the roof deck
- Revisit the repair after the next heavy rain to check for any signs of leaking
Taken together, these five steps cover the basics of a straightforward shingle repair, but they assume the damage is limited and easily accessible. Anything involving a steep pitch, extensive damage, or an area near a chimney or valley is a good reason to bring in a professional instead, since those areas tend to punish small mistakes more than a simple flat section would.
What Professional Roof Shingle Repair Costs
Cost is often the deciding factor between attempting a repair yourself and calling in a professional. As a rough industry estimate, professional shingle repair costs typically range from a few hundred dollars for a small, isolated repair up to well over a thousand dollars for more extensive damage, with the final number depending heavily on accessibility and scope.
Minor Repairs
Replacing a handful of shingles in an easily accessible area tends to fall at the lower end of that range, since the labor and material involved are minimal and the work usually wraps up in an hour or two.
Moderate to Extensive Repairs
Damage that spans a larger section of the roof, involves multiple layers, or requires addressing underlying decking issues pushes costs toward the higher end, since it often requires more time, additional materials, and sometimes a second visit to confirm everything is sealed properly.
These figures are meant as a general starting point rather than a firm quote, since the specific scope of damage, roof accessibility, and material type all affect the final number. A written estimate from a roofing contractor remains the most reliable way to know what your specific repair will cost.
DIY Repair vs Calling a Professional
Deciding whether to tackle a shingle repair yourself or bring in a professional comes down to a few practical factors beyond just cost. Weighing these honestly before starting the work helps avoid a repair that ends up needing to be redone by someone else a few weeks later.
| Factor | DIY Repair | Professional Repair |
| Best for | Small, easily accessible, isolated damage | Steep pitches, extensive damage, chimneys and valleys |
| Typical cost | Materials only, generally under $50 | Ranges based on scope and accessibility |
| Safety considerations | Requires comfort with ladder and roof work | Handled with proper safety equipment and training |
| Long term reliability | Depends heavily on skill and materials used | Backed by experience and often a workmanship warranty |
| Insurance documentation | Rarely creates a usable record for claims | Often includes documentation useful for insurance purposes |
A small, easily reached repair on a gentle slope is often reasonable for a handy homeowner with the right materials and safety gear. Anything involving height, multiple stories, extensive damage, or areas prone to leaks like valleys and chimneys is worth handing to a professional, both for safety and because a rushed DIY repair can sometimes create more problems than it solves, especially if the underlying cause of the damage was never actually addressed. If your property is under a homeowners association or has any access restrictions, it’s also worth confirming whether you need permission before work begins, even for a small repair.

Get Your Shingle Repair Done Right
Whether you’re dealing with a handful of cracked shingles or a larger section that’s clearly seen better days, addressing the damage promptly protects the rest of your roof and your home underneath it. Roof Troopers has helped homeowners throughout Falls Church and surrounding areas assess shingle damage and decide on the right repair approach, using a thorough inspection to clear debris, check for trapped moisture, and determine whether a targeted fix or something more extensive makes sense. Our team explains exactly what we find and why, without pushing a bigger project than the situation actually calls for, so you can make a decision with confidence. If you’ve noticed damaged shingles and want a professional opinion before deciding how to proceed, contact us today and we’ll help you figure out the right next step.
Don’t pay for your roof until 2027!
0% APR, same as cash for 24 months
Get Started Today!
"*" indicates required fields