Are you a homeowner looking to improve your roof’s energy efficiency and comfort? One key way to achieve this is by installing metal roof insulation. Insulation not only regulates your home’s temperature but also reduces energy costs and enhances overall living comfort.
This guide will walk you through everything you need to know about metal roof insulation, including why it’s essential and how to install it step-by-step. Here’s what we’ll cover:
- Why metal roof insulation matters
- Step-by-step guide to install metal roof insulation
- Tips for maintaining an insulated metal roof
🤔 Why Metal Roof Insulation Matters

Before digging into the step-by-step process, it’s essential to understand why metal roof insulation is a must-have for homeowners. Insulation offers significant energy savings by keeping your home cooler during the summer and warmer during the winter, which can dramatically lower your heating and cooling bills. Additionally, it provides soundproofing benefits, as metal roofs often amplify outside noise, but insulation works to dampen those sounds for a quieter indoor environment. Another key advantage of proper insulation is condensation control. It prevents moisture buildup, reducing the risks of mold, mildew, and long-term roof damage. Lastly, insulation enhances the durability of your metal roof, adding extra protection to ensure it lasts longer against wear and tear.
Different Types of Insulation for Metal Roofs
Not all insulation is created equal. Choosing the right option for your home ensures maximum benefits. Here are some popular choices for metal roof insulation:
- Rigid Foam Boards: High R-value, durable, lightweight, but costlier than other options.
- Spray Foam: Perfect for hard-to-reach areas, offers air-tight sealing, but may require professional installation.
- Fiberglass Batts: Budget-friendly and easy to install, but less effective in humid climates.
- Radiant Barriers: Great for reducing heat in hot climates, affordable, but not ideal for soundproofing or cold climates.
✅ 7 Step Guide to Install Metal Roof Insulation

Follow these seven steps to properly install metal roof insulation:
1 – Measure Your Roof
Start by taking accurate measurements of your roof’s surface area. Use a tape measure or laser measuring tool for precision. Be sure to include overhangs, gables, and additional features like dormers in your calculations, as these will require insulation as well. Divide the roof into manageable sections if it’s particularly large, so you can measure each part thoroughly. Accurate measurements are crucial to avoid buying too much or too little insulation material, saving you time and money.
2 – Choose and Prepare Insulation
Select the type of insulation that best suits your home, climate, and roof type. Options include rigid foam board insulation, spray foam, or fiberglass batts, each with its own benefits. For example, rigid foam is durable and moisture-resistant, while fiberglass batts are cost-effective and widely available. Once you’ve made your choice, cut the material into manageable pieces, ensuring they fit snugly between roof supports or metal roofing panels. Double-check your measurements before cutting to avoid wasting materials. Organize the prepared insulation pieces near your workspace for easy access during installation.
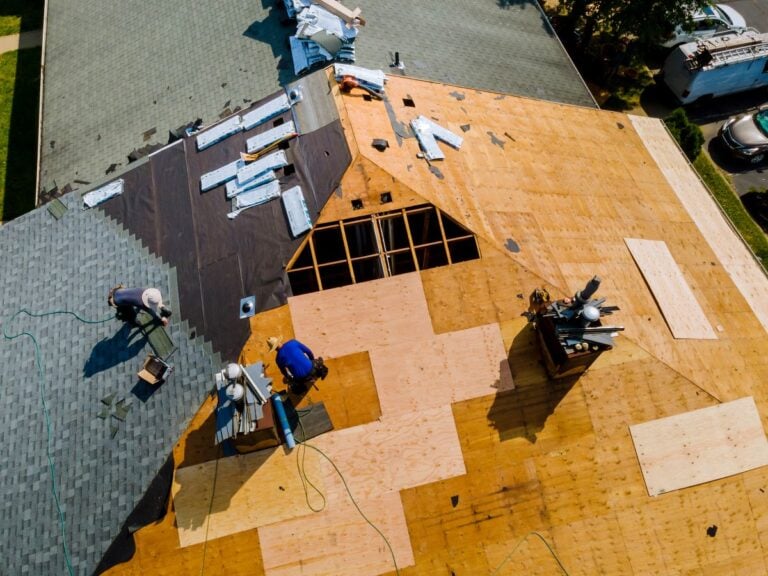
3 – Clean and Inspect the Roof
Before starting the installation, make sure your roof is completely clean and in good condition. Remove any dirt, debris, or old materials that could interfere with the insulation. Use a broom, vacuum, or pressure washer for thorough cleaning, but ensure the roof is dry before proceeding. Inspect the roof’s structure for any signs of damage, such as cracks, leaks, or rotting wood. Address these issues immediately, as failing to do so could compromise the insulation’s effectiveness and the overall integrity of your roof.
4 – Install Vapor Barrier (Optional)
In regions where condensation is a concern, adding a vapor barrier is an essential step. This layer helps block moisture from seeping through the insulation, preventing mold growth and structural damage. Choose a high-quality vapor barrier material and cut it to match the dimensions of your prepared insulation pieces. Secure the vapor barrier to the roof using staples, tape, or adhesive, ensuring there are no wrinkles or gaps. Overlap the edges of each section slightly to create a seamless barrier against moisture.
5 – Attach Insulation
With the roof cleaned and prepared, it’s time to attach the insulation. Use roofing screws, fasteners, or adhesive to secure the insulation to the roof surface. Place each piece carefully, ensuring it fits snugly between any supports or panels. For sloped roofs, start at the bottom and work your way up to prevent pieces from slipping during installation. If you’re using multiple layers of insulation, stagger the seams to improve coverage and reduce thermal bridging. Take your time to ensure a tight, even fit across the entire roof.
6 – Seal the Edges
Once the insulation is in place, seal all edges, gaps, and seams with high-quality tape or sealant. This step is crucial to preventing air leaks and keeping the insulation secure over time. Pay extra attention to areas around vents, chimneys, and other roof features, as these can be common points of air or moisture infiltration. A well-sealed edge not only improves energy efficiency but also protects your home from potential water damage and drafts.
7 – Test for Gaps and Coverage
The final step is to test your work for any gaps or uncovered areas. Walk along the roof and inspect the insulation visually, looking for spots where the material might be loose or missing. If available, use a thermal camera to spot any areas where heat might be escaping, as this can indicate insufficient coverage. Address any issues you find, ensuring the insulation is tight and secure. With everything in place, your roof is now properly insulated, helping reduce energy bills and improve your home’s comfort for years to come.
💡 Tips for Maintaining an Insulated Metal Roof

Maintaining an insulated metal roof is essential to ensure its durability, energy efficiency, and long-term performance. Proper care helps prevent damage, reduces energy costs, and extends the lifespan of your roof.
Regular Inspections
Conduct regular inspections of your insulated metal roof to identify any signs of wear, damage, or moisture buildup. Look for issues such as rust, loose panels, or insulation that appears damp or degraded. Catching these problems early can prevent costly repairs down the line and extend the lifespan of your roof.
Clean the Roof
Make it a habit to clean your metal roof and gutters regularly. Debris, dirt, and leaves can accumulate and cause blockages or damage over time. Keeping the roof clean not only ensures proper drainage but also helps maintain its appearance and durability. Use appropriate cleaning tools and solutions to avoid causing scratches or corrosion.
Hire Experts for Repairs
If you notice that your insulation is deteriorating or your roof has sustained damage, it’s best to bring in professionals like Roof Troopers. Experts can identify and resolve underlying issues quickly and efficiently, ensuring your roof remains in top condition and continues to provide effective insulation. Avoid DIY fixes, as improper repairs can lead to more significant problems later.
🏠 Metal Roof Installation
When it comes to metal roof insulation, choosing the right team makes all the difference. At Roof Troopers, we combine years of expertise with a commitment to quality, ensuring your home is protected, energy-efficient, and built to last. Our personalized approach, use of premium materials, and dedication to exceeding industry standards have made us a trusted partner for homeowners in Fairfax Station and beyond.
Ready to enhance your roof with professional insulation or need expert guidance on your roofing project? Contact Roof Troopers today for a no-obligation quote and experience the difference of working with a team that puts your needs first!
Don’t pay for your roof until 2027!
0% APR, same as cash for 24 months
Get Started Today!
"*" indicates required fields