Understanding what goes into a professional roofing job changes how you evaluate the work being done on your home. Whether you are managing a contractor, tackling minor repairs, or simply trying to spot the difference between a prepared crew and an underprepared one, knowing your roofing tools is genuinely useful knowledge. For homeowners in Lorton and surrounding areas, this guide breaks down every major tool category so you can follow along confidently when professional installation or repair work is underway.
Here is what you will learn in this guide:
- Why the tools a crew uses directly affect the quality and durability of your roof
- A full breakdown of the most important roofing tools by category
- What each tool does and why it matters on the job
- How to spot a well-equipped, professional roofing crew
- When tool selection signals cutting corners versus doing the job right

Why Knowing Roofing Tools Matters as a Homeowner
Most homeowners think about roofing in terms of materials and price, but the tools a crew brings are just as important to the final result. A nail gun that is improperly calibrated can drive fasteners too deep or leave them proud of the shingle surface, both of which compromise wind resistance and water performance. A crew without proper fall protection creates liability exposure for the homeowner and raises questions about the professionalism of the operation overall.
Knowing the standard toolkit helps homeowners ask better questions and evaluate bids before signing a contract. In Lorton and surrounding areas, where seasonal storms and temperature swings consistently stress residential roofs, the difference between a well-executed installation and a shortcut job often comes down to whether the right tools were used correctly.
- Installation quality depends on the right equipment: Roofing nail guns increase productivity significantly compared to hand nailing, driving fasteners at consistent depth across thousands of nails daily. Manual nailing at that scale introduces inconsistency that affects long-term performance.
- Safety is a professional obligation: According to the Bureau of Labor Statistics, the roofing industry recorded 134 fatalities in 2023, with 82% attributed to falls, slips, or trips. Personal protective equipment, including harnesses and hard hats, runs between $85 and $275 per worker and is a non-negotiable part of any professional setup.
- Tool condition reflects crew standards: Dull blades, worn pry bars, and improperly calibrated nailers all produce lower-quality work. Regular cleaning and lubrication extend tool lifespan, and proper storage prevents rust and damage between jobs.
- Speed and cleanliness matter: The right tools allow a professional crew to complete a standard residential replacement in a single day while keeping the job site clear of debris.
Recognizing these connections turns tool knowledge into a practical evaluation framework. For smaller DIY repairs, basic hand tools cost between $245 and $650 and power tools from $295 to $665. Renting roofing tools can also reduce upfront costs significantly for one-off jobs.
10 Essential Roofing Tools Every Professional Crew Should Have
The tools below cover the complete working toolkit for a residential roofing crew in 2026. Some are hand tools, some are power tools, and some are safety equipment, but all belong on a properly equipped job site. Understanding each one helps you recognize whether the crew you hired is ready to do the job correctly.
1. Pneumatic Roofing Nailer
The roofing nailer is the primary fastening tool on any shingle installation. It drives nails at consistent depth across every fastening point — nails too deep cut through the shingle mat and nails too shallow leave the head exposed to weather. A properly calibrated nailer is adjusted for the specific shingle type before work begins.
- Coil nailers hold more nails and reduce reloading time on large jobs
- Nail depth must be tested on scrap before the first course
- Different nail types are required for different wind exposure zones

2. Roofing Hatchet
The roofing hatchet combines a hatchet blade for scoring and cutting shingles with a hammerhead for driving nails. Roofers reach for it where a nailer is awkward, particularly around ridges, hips, and valleys where precision matters more than speed.
- Adjustable exposure gauge maintains consistent shingle overlap
- More controlled than a nailer in tight flashing areas
- Used for splitting damaged shingles during repair work
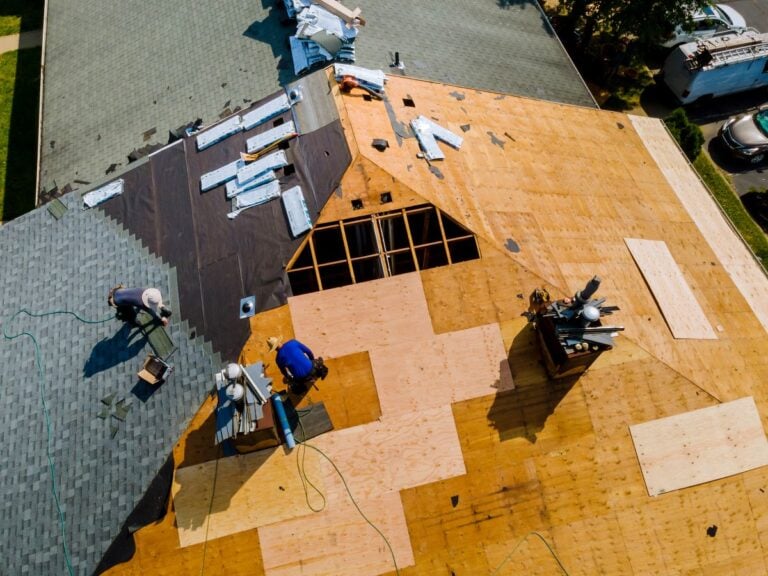
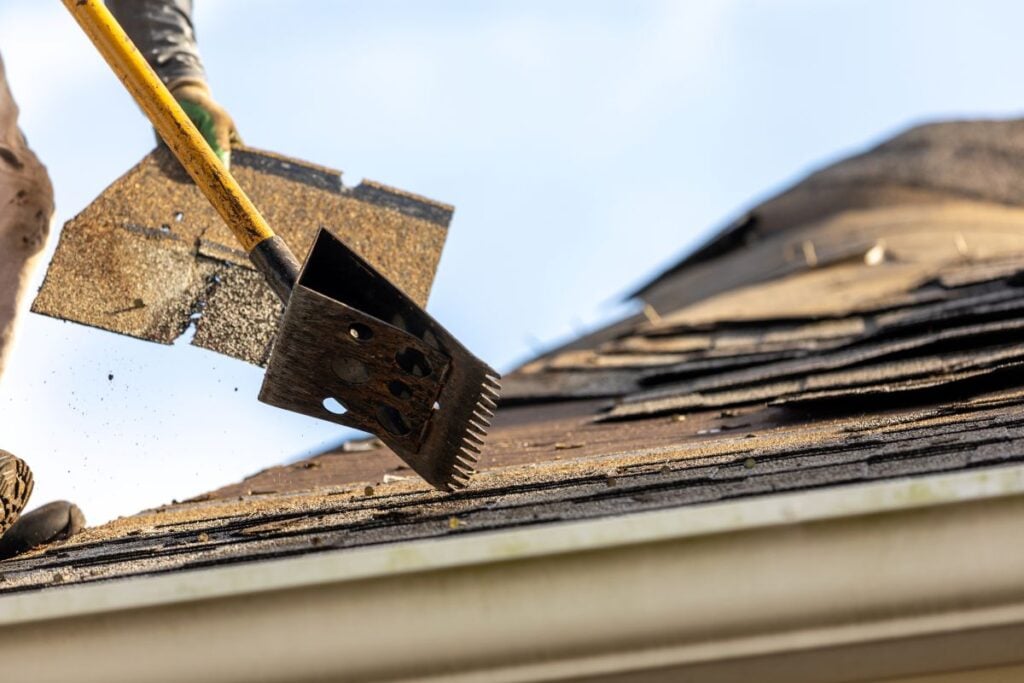
3. Pry Bar and Shingle Remover
Tear-off requires a flat pry bar or dedicated roofing shovel designed to slide under shingle courses and pop nails without damaging the decking below. A roofing shovel is essential for removing old shingles efficiently. Many crews also run magnetic sweepers across the ground afterward to capture stray fasteners before they damage tires or landscaping.
- Reduces the risk of gouging the roof deck during removal
- Long handles reduce back strain during extended tear-off work
- Used with a hammer or mallet for stubborn nail extraction
4. Chalk Line
A chalk line snaps a straight reference across the roof deck so shingle courses stay aligned from eave to ridge. Without it, courses drift out of parallel, affecting appearance and water-shedding performance.
- Snapped before each section to maintain consistent alignment
- Used to mark cut lines for valleys, hips, and ridge caps
- Blue chalk is standard; red is used for permanent layout marks
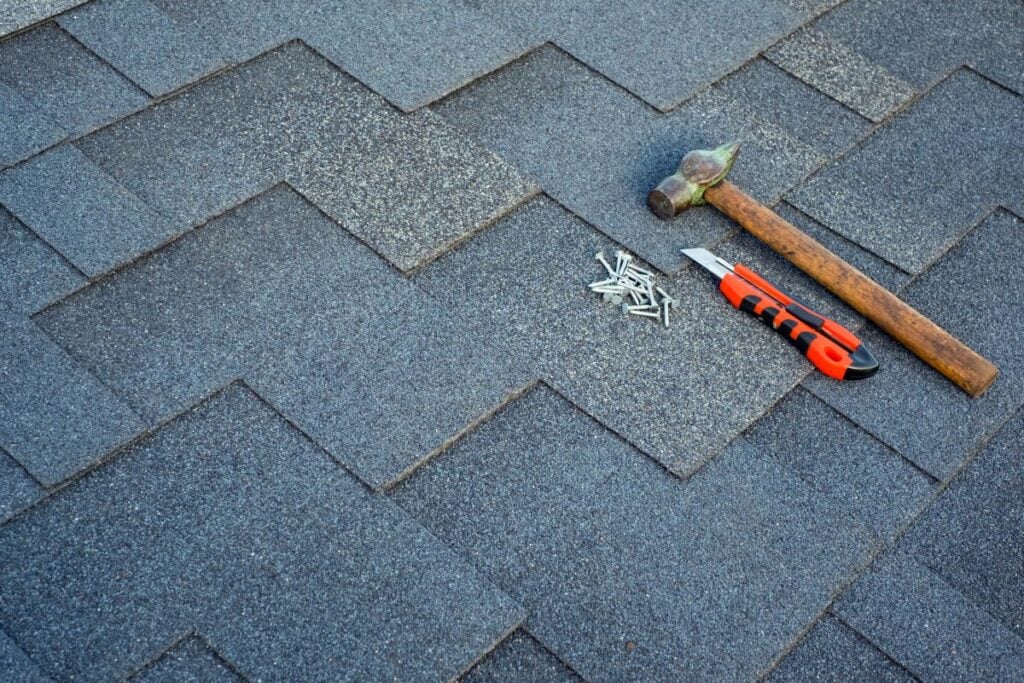
5. Utility Knife
Utility knives are among the most-reached-for cutting tools on any roofing job, used for cutting shingles and underlayment around penetrations, along rakes, at valleys, and at ridge lines. Hook blades are standard because they score from the back of the shingle without cutting through the granule surface. Blades dull quickly on asphalt and must be changed frequently.
- Hook blades protect granule coverage during cuts
- Retractable knives are the safety standard on professional sites
- Replacement blades are a consumable on every roofing job
6. Air Compressor
The air compressor powers the pneumatic nailer and any other air tools on the job. Compressor size and pressure must match the nailer’s requirements. An undersized unit causes inconsistent nail depth when tank pressure drops mid-job, invisible at the time but consequential long-term.
- Most roofing nailers require 70 to 120 PSI operating pressure
- Hose length and diameter affect pressure at the tool
- A compressor running constantly may be undersized for the job
7. Roof Jacks and Planks
Roof jacks are metal brackets that nail to the deck and support a plank, creating a flat working platform on sloped surfaces. Properly placed jacks are a visible sign of a crew prioritizing both safety and workmanship quality.
- Typically placed every four feet across the working area
- Nail holes are sealed before overlying shingles are laid
- Planks must be rated for the load they carry
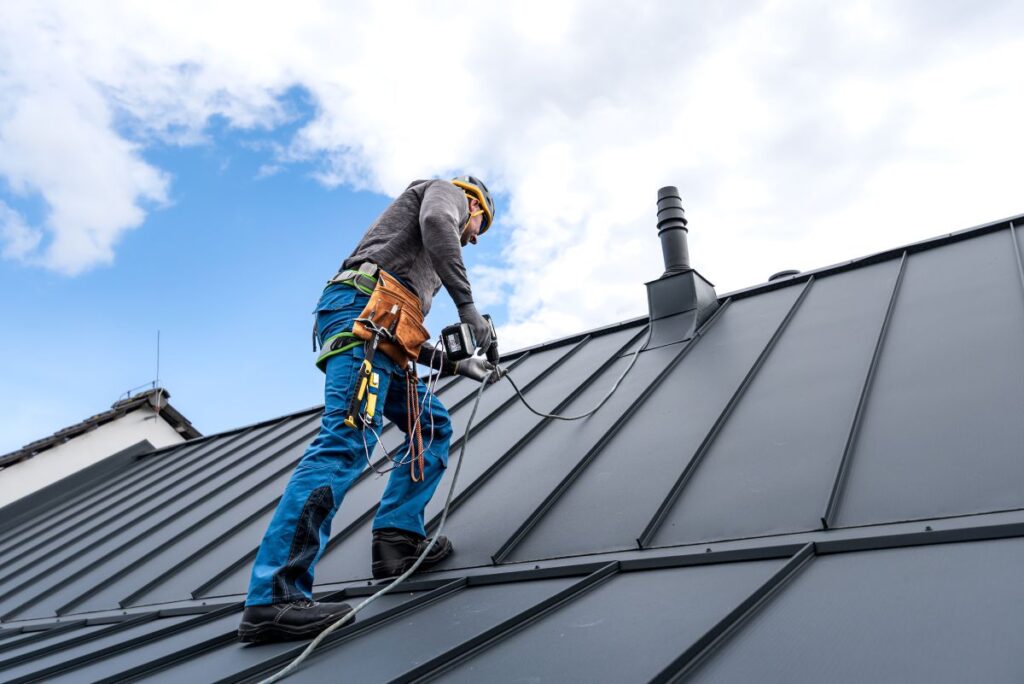
8. Fall Protection Harness and Anchor System
OSHA Standard 29 CFR 1926.501 requires fall protection for any worker exposed to a fall of six feet or more in residential construction. A properly fitted harness connected to a certified roof anchor via a shock-absorbing lanyard is the standard system. Roof safety harnesses must be rated to stop a fall of 5,000 pounds, and hard hats must meet ANSI safety standards.
- Harnesses must be inspected before each use for wear or damage
- Anchor points must be installed into structural members, not just decking
- Lanyards include energy-absorbing components that limit forces on falls
9. Tape Measure and Speed Square
A 25-foot or 30-foot tape measure handles reveal distances, shingle cuts, and layout. A speed square gives a fast 90-degree reference for starter courses, hip caps, and ridge pieces, and doubles as a straight-edge guide for utility knife cuts.
- Wide-blade tapes hold their extension further without support
- Measurements at eave and ridge should be compared to identify any splay
10. Caulking Gun and Roofing Sealant
Sealant is applied at every flashing point, pipe boot, and roof penetration as a finishing step. A caulking gun with smooth pressure control delivers a consistent bead without voids. Sealant completes the waterproofing system but never substitutes for properly installed mechanical flashing.
- Must be compatible with the flashing material being sealed
- Color should match the shingle to minimize visual impact
- Applied only after all flashings are mechanically fastened
These ten tools represent the baseline for a professionally equipped residential roofing crew. A job site visibly missing several of them warrants a direct conversation with the contractor before work begins.
What Separates Professional-Grade Tools from Budget Equipment
Not all roofing tools are created equal, and the gap between professional and budget equipment shows up in durability, precision, and safety. Well-equipped crews also carry tin snips for sizing and trimming metal flashing to ensure a watertight finish, an extension ladder rated for the roof height, and a ladder hoist for moving materials up without risky manual carries.
- Nailer calibration: Professional crews test nail depth on scrap before the first course. An unchecked nailer shows up as callbacks and failed warranty inspections.
- Harness condition: A visibly frayed or loosely fitted harness is not providing real protection.
- Blade sharpness: Roofers change utility knife blades multiple times per day on large jobs — dull blades compromise waterproofing at shingle edges.
- Compressor capacity: A unit running constantly may be undersized, creating inconsistent fastening throughout.
- Chalk line quality: A worn chalk line produces blurry marks that make course alignment harder across a large roof surface.
Each of these details is visible during a brief job site visit, and together they give a clear picture of how seriously a crew takes the work.

How Tool Knowledge Helps You Choose the Right Contractor
Recognizing a well-equipped crew is one of the most practical things a homeowner can do before a project starts. A contractor who arrives with an organized truck, visible safety gear, and properly staged equipment is showing you something about how they operate before the first shingle goes down. Three questions are worth asking.
Ask About Nail Specification
Different roofing systems require different nail lengths, diameters, and fastening patterns. Asking which specification a contractor follows reveals whether they adhere to manufacturer guidelines. Crews that deviate can void warranty coverage without the homeowner knowing.
Watch for Missing Safety Equipment
A crew working without harnesses on a steep or two-story roof is violating OSHA requirements and creating liability exposure for the property owner. Consistently used safety gear is the most reliable signal of a professional operation.
Verify Tear-Off Equipment Is Present
A full replacement requires proper tear-off tools. If a crew arrives with only a pry bar, ask specifically about their tear-off process and debris management before work begins.
Your Roof Deserves the Right Tools and the Right Team
The quality of your roof installation is inseparable from the equipment and process behind it. Every tool in this guide exists because roofing demands precision, safety, and attention at every step, and cutting corners on tools cuts corners on the finished product. Roof Troopers arrives on every job in Lorton and surrounding areas with a fully equipped crew, proper safety systems, and manufacturer-certified practices that protect your warranty from day one. When you are ready to get your roof done right, contact us today and we will walk you through exactly what to expect.
Don’t pay for your roof until 2027!
0% APR, same as cash for 24 months
Get Started Today!
"*" indicates required fields